Puppies & Kittens How-to
How to Trim Puppy Nails: When to Start and a Gentle First Session
Short answer
Start in your first week or two together: a few days of paw handling with treats, then a first trim that takes just the sharp tip off one or two nails. After that, take a sliver off every week or so, stop well short of the quick, and end each session while your puppy is still relaxed.
When to start trimming a puppy’s nails, and how often
There’s no birthday to wait for. The American Kennel Club’s guide to trimming a dog’s nails safely says to handle a puppy’s feet and trim the nails while they’re young so the process becomes familiar, and VCA Animal Hospitals notes that routine trims started in puppyhood help with cooperation as a dog grows up. In practice, that means touching paws from the first days at home and a first, tiny trim as soon as your puppy relaxes into being handled.
How often is mostly about habit. For adult dogs, the AKC’s rhythm is a trim every three to four weeks and VCA’s is roughly monthly. With a puppy, smaller and more frequent works better: a sliver off each nail every week or so. Puppy nails are thin, so each one takes seconds, and a weekly session keeps trimming ordinary rather than a monthly event your puppy has to get used to all over again.
Between sessions, your puppy will show you when the tips are due: scratches on your arms during play, nails snagging on blankets or your sleeves, or a click on hard floors.
Tip
One paw a day counts as a full session. Four short, easy sessions across a week teach a puppy more than one long session that ends in a struggle, and the nails get done either way.
Paw handling first: a week of touch and treats
A trim is several new things at once: a held foot, a pressed toe, a strange tool and a strange sound. Introduce them one at a time and the trim itself becomes the last small step. The AKC’s guide lays out a seven-day plan along these lines: your puppy sniffs the clipper or grinder, then feels it touch each paw, then hears the clipper squeeze or feels the grinder buzz without any trimming. The first trim comes on day five, just the tiniest tip of one front nail, then two nails on day six and a few more each day after that. Some puppies need longer at each step, and that’s fine.
A few puppy-specific details make that week go smoothly:
- Touch, then treat. Hold the paw for a second, let go, then give a pea-sized treat, so the touch predicts the food rather than the other way around.
- Press a toe now and then. Gently squeezing a toe pad so the nail extends is the exact move a trim needs, so rehearse it while the tools stay in the drawer.
- Keep it to a minute or two. Stop while your puppy is still soft-bodied and eating.
Handling for the ears, mouth and tail, plus a first brush, is covered in our guide to getting a puppy used to grooming. If your puppy already pulls away or mouths your hand whenever you reach for a foot, slow right down with the plan in what to do when a dog doesn’t like their paws touched; the same small steps work for puppies.
Clippers or a quiet grinder for small puppy nails
Either tool works. The AKC calls clippers and grinders both safe when used correctly, and the ASPCA says the two clipper styles, scissor-type and guillotine-type, work equally well. For a puppy, the choice often comes down to which part of the job bothers them less: the squeeze and snap, or the hum and vibration.
| Tool | Good for | Watch for |
|---|---|---|
| Clippers | Snipping thin tips in seconds | Taking too much in one cut |
| Grinder | Thin layers and smooth edges | Buzz, vibration and long paw fur |
| Both | Clip the hook, then smooth the edge | Two tools to introduce |
Small scissor-style clippers made for small dogs or cats are easy to control on tiny nails, and you can see where the blades will close. A grinder takes the nail down in thin layers, which VCA says carries less risk of damaging the quick, and it rounds off the needle-sharp edges that scratch when a puppy jumps up. On a puppy, keep each touch to a second or two on the lower speed. Guard openings, grip and keeping fur clear are covered in how to use a dog nail grinder.
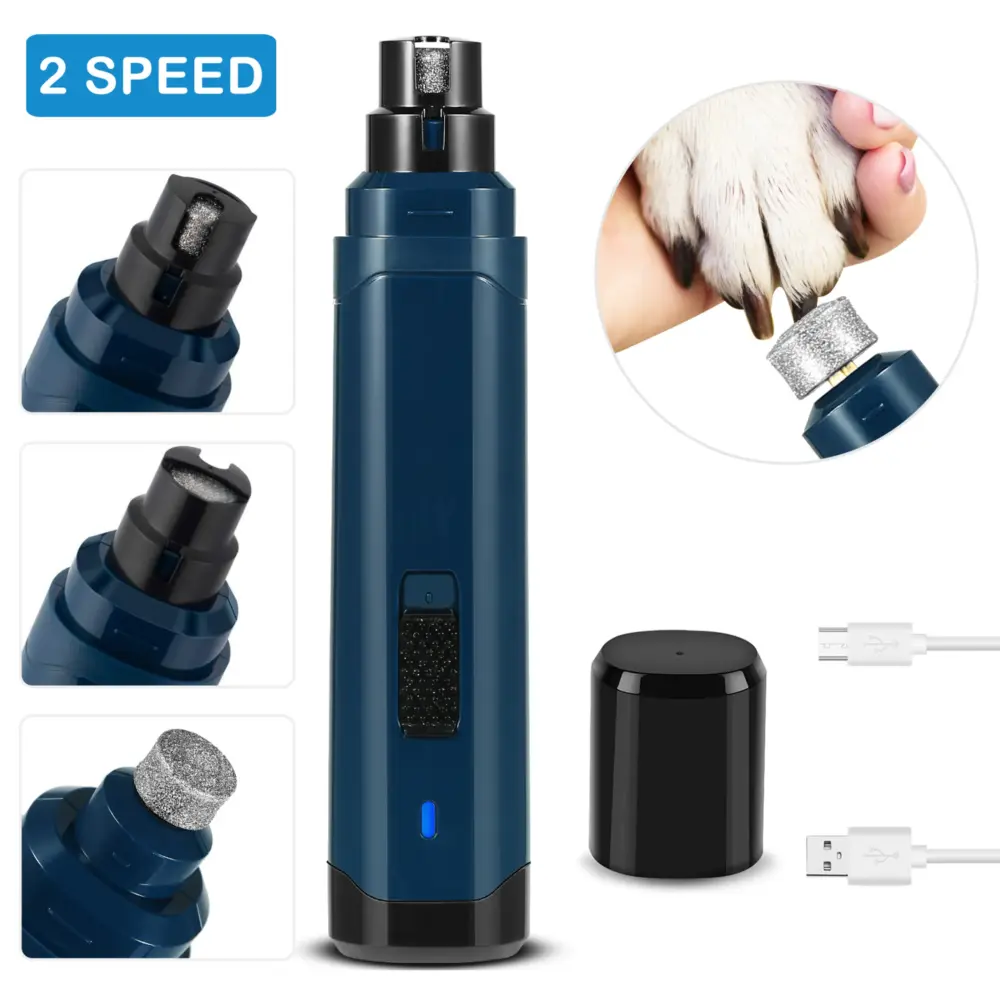
Our nail tool is a grinder; we don’t sell clippers. The Quiet Rechargeable Pet Nail Grinder charges by USB, switches between two speeds for small and large nails, and its guard openings suit dogs, cats and other small pets. Quiet isn’t silent, so give your puppy the sniff-and-listen days above before it touches a nail. Both picks below come from Nilosi’s own catalog, so they cover only part of the kit: styptic powder, and clippers if you prefer them, will have to come from elsewhere.
-
Quiet Rechargeable Pet Nail Grinder, View product
$50.95
Why it fits: Two speeds cover small and large nails, so a puppy can start on the lower one, and the guard has openings sized for cats and small pets.
-
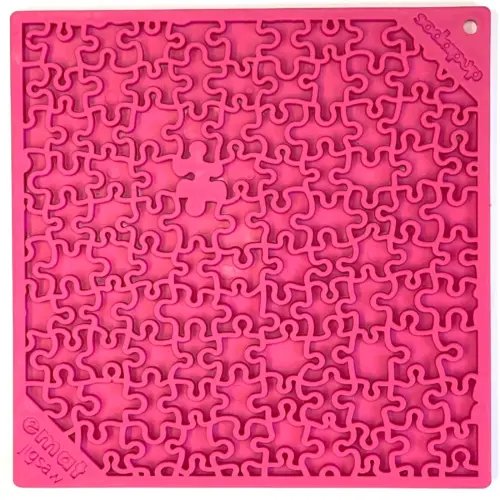
SodaPup
Jigsaw Enrichment Lick Mat for Dogs & Cats, Choose color
$25.95
Why it fits: Gives a wriggly puppy one calm job during the trim, and a frozen smear of wet puppy food in the grooves makes the licking last.

What else to have within reach
- Styptic powder, opened before you start. VCA notes that flour or cornstarch will do if you don’t have any.
- Tiny soft treats your puppy can swallow at once, or a lick mat with a thin smear of wet puppy food. Our guide to what to put on a lick mat covers spreads to skip and how long to freeze it. Stay close, and pick the mat up if your puppy starts chewing it.
- Good light, such as a lamp beside you or a bright window, so you can see the pink quick through light nails.
- A towel or bath mat on the floor. Sit down with your puppy rather than perching them on a table they could leap from.
- A helper, if someone’s home, to hand out treats or hold the lick mat at nose level.
Still gathering supplies for the first weeks? Our new puppy checklist covers the rest of the kit.
How to trim puppy nails, step by step
Plan on one or two nails for the first real trim, and build from there.
- Choose a sleepy moment. The ASPCA’s grooming tips suggest tiring your dog out with exercise first. After play or a meal, a puppy would rather settle than wrestle.
- Get settled on the floor. Sit with a small puppy in your lap, their back against your body, or let a bigger puppy lie beside you. Load the lick mat or line up treats first.
- Hold one toe. As the AKC describes, put your thumb on the toe pad and your forefinger on top of the toe, then press gently so the nail extends. Fold long fur out of the way.
- Find the quick. On a light nail, look from the side for the pink core and plan to stop well before it. Dark nails need a different approach, covered below.
- Take only the hooked tip. With clippers, snip straight across, a sliver at a time. With a grinder, use the lower speed, touch for a second or two, then lift off and look.
- Treat after every nail. Trim, then reward straight away, before you move to the next toe. A pause at the lick mat between nails is fine.
- Stop while it’s still going well. End before the wriggling starts, even halfway through a paw, and note where you stopped so the next session picks up there.
Dewclaws, dark nails and wriggly puppies
Dewclaws
Dewclaws sit on the inner side of the leg, a little above the paw. The AKC’s explainer on what dewclaws are says almost all dogs are born with one on each front leg. Some dogs have them on the back legs too, and breeds such as the Great Pyrenees and Briard are known for double rear dewclaws. Because they never touch the ground, walking can’t wear them down, and VCA warns that an overgrown dewclaw can curve around into the paw pad.
Feel for them at every session, since puppy fluff hides them well; the AKC says dewclaws often need trimming more frequently than the other nails. Hold the dewclaw itself steady between finger and thumb, then take just enough that your finger slides off the tip without catching.
Dark or black nails
You can’t see the quick through a dark nail, so take tiny slivers and look at the cut surface each time. The AKC says to watch for a chalky white ring, and the ASPCA describes a circle appearing on the cut surface as the quick gets near; either one is your cue to stop on that nail. Light nails on the same puppy give a rough guide, but the quick varies from toe to toe. A grinder makes the thin-layer approach easier, and the grinder guide linked above shows how a black nail changes as you work back.
Wriggly or mouthy puppies
- Shrink the session. One nail, a treat, and done. Tomorrow, two.
- Give your puppy a job. A helper holding the lick mat at nose level gives the mouth something better to do than grab your hand.
- Try another position. Some puppies settle lying on their side across your lap; others do better sitting with their back to your chest.
If you nick the quick, and when to call the vet
The quick carries the nail’s blood vessels and nerves, so a nick there hurts and bleeds. It happens to careful owners, especially on dark nails, and how you handle the next few minutes shapes the next trim.
- Press styptic powder onto the end of the nail with gentle pressure, or use flour or cornstarch as VCA suggests.
- Keep your puppy calm and close for a few minutes so the clot can set, and leave the rest of the nails for another day.
- Finish on something pleasant, such as the lick mat or a quiet cuddle, so the session doesn’t end on the sting.
- Go back a step next time. Handle the paws without the tool for a session or two, then take smaller slivers than before.
Safety note
Call your veterinarian if the bleeding hasn’t stopped after a few minutes of steady pressure, if a nail is split or torn, or if a toe looks swollen or your puppy limps or keeps licking at it later. Ask for help, too, if your puppy panics or growls at every trim; your veterinarian or a groomer can keep the nails short while you go back to handling practice at home.
Mistakes that make puppies dread nail trims
- Doing every nail on the first try. You may finish, but your puppy learns that a held paw means a long, unpleasant session.
- Cutting for length. A puppy’s nails usually need just the sharp hooks off, not a dramatic shortening. Chasing length is how quicks get cut.
- Holding a struggling puppy down. A trim you force through today makes every later one harder. Stop, and come back later with a smaller goal.
- Saving paw handling for trim day. Touch paws during cuddles and after walks too, so a hand on a foot doesn’t always mean nails.
A nail routine that grows with your puppy
Through the puppy months, a weekly look and a sliver off any sharp tips is usually enough. If you’ve never trimmed a dog’s nails, the AKC suggests asking your veterinarian or a vet tech for a lesson. An early puppy checkup is a good time, since seeing where to stop on your own puppy’s nails beats any diagram.
As your puppy matures, the goal shifts from habit to length. The adult target is nails that sit just clear of the floor when your dog stands, and the rhythm moves toward the AKC’s three to four weeks, adjusted for how fast the nails grow and how much time your dog spends on pavement. Our guide to how long a dog’s nails should be explains the standing check and the signs a trim is overdue.
Keep the dewclaws on the list for life, keep the treats coming even once trims are easy, and keep the styptic powder where you can find it. The grinder sits with our brushes, deshedding tool and pet wipes in the dog and cat grooming collection.
Related guides
-
How-to
How to Get a Puppy Used to Grooming: Touch, Brushing and the Groomer
Short, rewarded sessions that teach a puppy to accept grooming before any dislike sets in: touch for paws, ears, mouth and tail, a first brush matched to the coat, wipes between baths, groomer practice at home, and the signs your puppy needs a break.
-
How-to
How to Groom a Senior Dog at Home: Brushing, Nails and Lump Checks
Many older dogs tire of standing, and shorter walks wear their nails down less. Here is how to set up a comfortable spot, brush gently by coat type, keep nails short, clean up between baths, check for lumps as you go and know when a groomer or veterinarian should take over.
-
How-to
How to Groom a Senior Cat: Gentle Brushing, Mats and Nails
When an older cat stops grooming, the fur on the lower back turns greasy and starts to mat. Here's why it happens, why a vet check comes first, and a gentle routine for thin skin, mats along the spine, thick overgrown claws and a clean back end.